click
image to enlarge
The
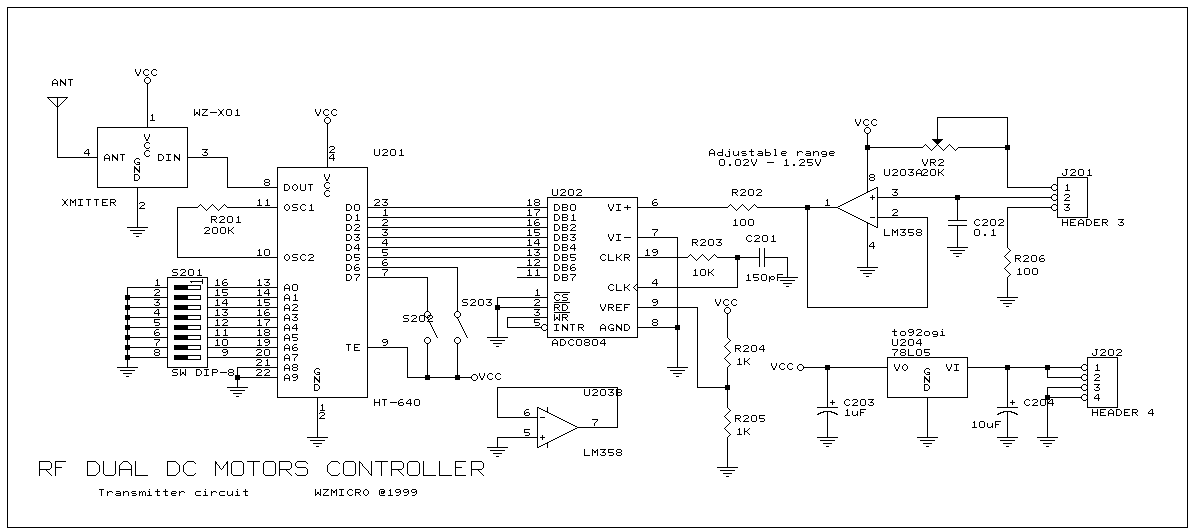
wireless PWM DC motor transmitter
circuit consists of WZ-X01 RF module, Holtek HT-640 encoder and 8-bit
A/D converter. U1 ADC0804 converts the analog voltage to digital data;
U2 encodes that data (D0~D6) along with D6, D7 and transmitting through
the RF transmitter module. The potentiometer VR1 varies the voltage to
the A/D U1 pin6, since only the lower 6 bits are used; the trim pot VR2
has to adjust so that the maximum input to the U1 will not exceed 1.25V.
The S2 (D6) and S3 (D7) are used for controlling the rotation direction
of the motors. S1 set the transmitter address; this address has to match
with the address of the decoder circuit.

click
image to enlarge
The
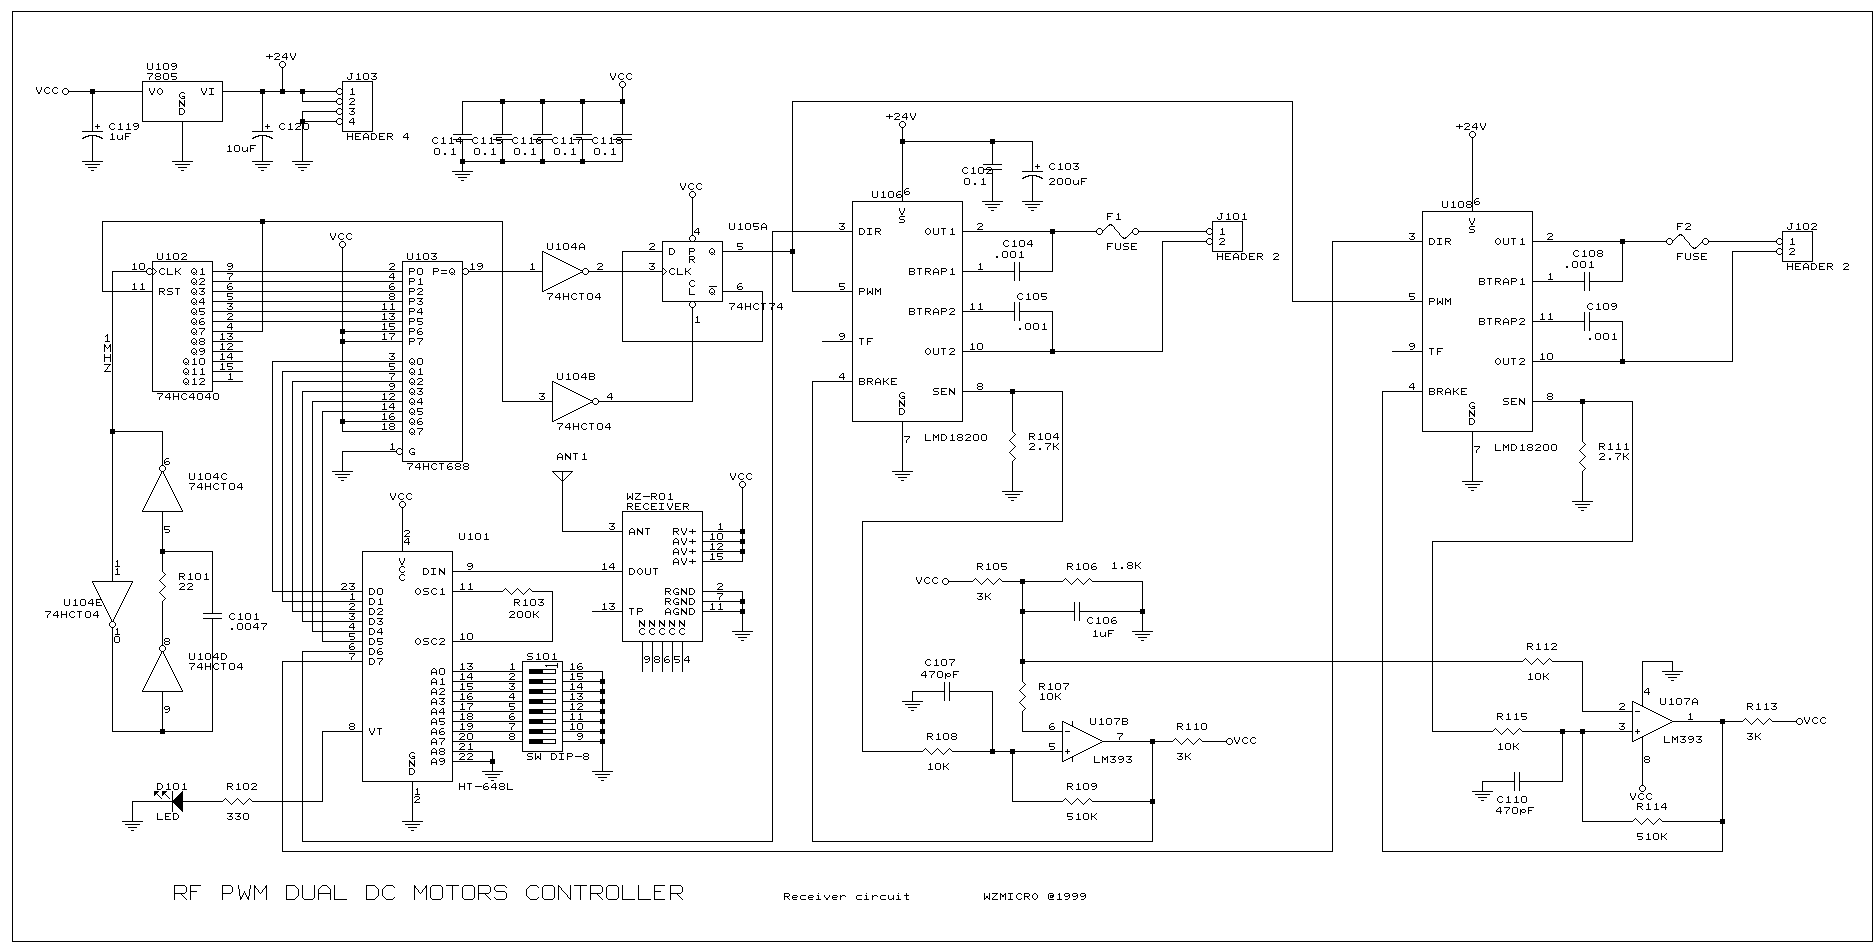
Wireless PWM DC Motor control receiver consists of RF receiver module
WZ-R01 receives the data from the transmitter and feeds that data to the
decoder U1 (HT-648L); the 8bit data will then be decoded. The first two
significant bits D7 and D6 control the motor rotation direction. The
lower 6 bits vary the duty cycle of the output pulse. U2 is a 12bit
counter; it is configured so that it will reset itself every 64 counts.
The oscillation circuit forms by U4c, U4d and U4e providing
approximately 1MHz clock to the counter U2.
The 8-bit magnitude
comparator U3 (74HCT688) compares the data from the counter U2 with the
data of the decoder U1; when data from both are match, it will output a
pulse to cause the D-flip flop U5 changing it's state.
By varying the data
output of the decoder from 0-64, the duty cycle of the output pulse at
U5 pin5 can also change from 0-100%. This output pulse will then be used
to control the speed of the motor.
With 1MHz clock input
the PWM frequency output is about 15.6KHz. The motor has less audible
noise when run at a frequency higher than 10KHz.You may need to change
the frequency depending on the motor you're going to use.
The motor driver
section is very straightforward; the
LMD18200 can handle 3A continuous
motor current and 6A peak. In this circuit the sign/magnitude mode of
operation is implemented. The current sensing circuit provides
protection to both the driver and the motor; it set at 2A max. You can
change the current limit by using a different current sensing resistor
value (see
LMD18200 data sheet for details) or the voltage reference at
pin6 of the U7Op-Amp

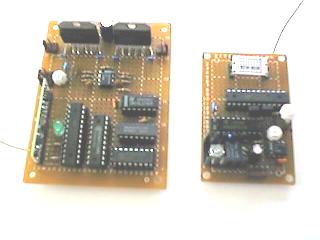
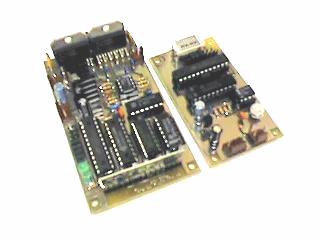
The above picture is the prototype, It works great!
We had been able to control the motors at more than 100 feet away.

You may
download this whole page in
PDF format.
For additional information and resources check the
Links
below...
All
of the components use in this project can be purchased from us. Email us
at info@wzmicro.com
if you have any questions or comments. Your feedback is mostly
appreciated